EPV-654 (MH20I) precision three-coordinate technical solution
Overview
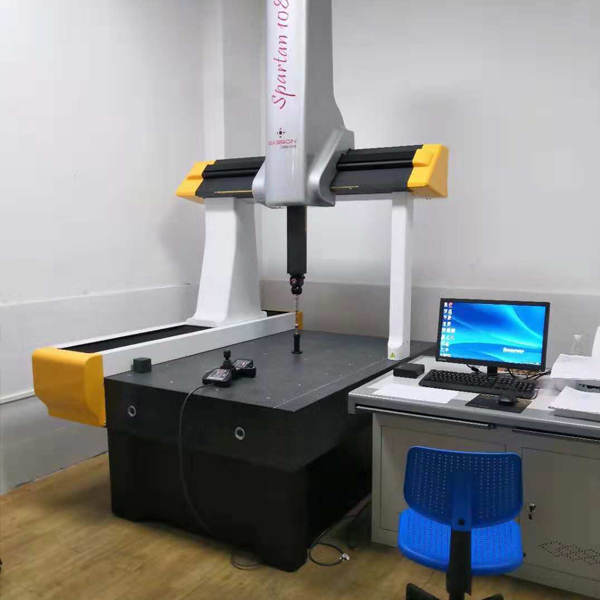
EPV series is a gantry mobile full-automatic three-coordinate measuring machine produced by our company. It has the characteristics of powerful functions, stable performance, high precision, simple operation, fast and efficient, convenient maintenance, etc., especially its control system and software functions, which have the world's advanced Level. Compared with other product series, this series has the characteristics of simple structure, strong load-bearing capacity, wide space for workpiece placement, and convenient loading and unloading.
1. Machine model specifications and main technical indicators
Specifications Model: EPV-654 |
|
Measuring range (mm)
|
Dimensions (mm)
|
Host weight (Kg)
|
Maximum bearing weight (Kg)
|
|
X
|
Y
|
Z
|
L
|
W
|
H
|
|
500
|
600
|
400
|
1420
|
1135
|
2310
|
900
|
500
|
|
Precision index:
|
|
Indication error of spatial measurement (µm) L:mm
|
Detection error (µm)
|
Resolution (µm)
|
|
2.3 + L/300
|
2.4
|
0.5
|
|
Maximum movement speed (mm/s) : 430
|
2.the machine configuration
Serial number |
Configuration
|
Name
|
Specification and description
|
Origin
|
Brand
|
Quantity
|
|
1
|
Host system
|
Host and machine support
|
EPV-654
|
|
Yixin
|
1
|
|
2
|
Control System
|
NOVA control system
|
Control cabinet
|
United Kingdom
|
Renishaw
|
1
|
|
Control handle
|
|
|
1
|
|
One CD of Visual DMIS CNC CAD+ measurement software (Windows operating system)
|
Domestic
|
|
1
|
|
3
|
Measurement software system
|
Rational DMISCNC measurement software
|
Visual DMIS CNC CAD+ measurement software lock
|
Domestic
|
|
1
|
|
Software lock
|
Visual DMIS CNC CAD+ measurement software operation manual
|
Domestic
|
|
1
|
|
Measurement software operation manual
|
Intel dual-core 3.0GHZ, memory 2 GB, hard disk 500 GB, 16x speed DVD-ROM drive, graphics card 1G, 19-inch widescreen LCD display (not less than this configuration)
|
Domestic
|
|
1
|
|
4
|
Computer system
|
computer
|
WINDOWS
|
|
Lenovo
|
1
|
|
printer
|
HP inkjet printer
|
|
HP
|
1
|
|
Tables and chairs
|
Computer tables and chairs
|
Domestic
|
|
1
|
|
5
|
Probe and stylus system
|
Probe base
|
MH20I
|
United Kingdom
|
Renishaw
|
1
|
|
Standard force measurement module
|
TP20
|
United Kingdom
|
Renishaw
|
1
|
|
Styli group
|
RENISHAW 3rd stylus assembly
|
United Kingdom
|
Renishaw
|
1
|
|
Ceramic calibration ball
|
Ф20
|
Domestic
|
|
1
|
|
Universal ball seat
|
|
Domestic
|
|
1
|
|
6
|
Main parts
|
Machine
|
00 grade Taishan green high-quality granite platform
|
Domestic
|
|
1
|
|
Grating ruler
|
High precision
|
United Kingdom
|
Renishaw
|
3
|
|
Air filter and automatic detection control device
|
|
Japan
|
SMC
|
1
|
|
Trachea connector
|
|
Germany
|
FESTO
|
|
|
Synchronous belt
|
|
United States
|
Gates
|
3
|
|
Drag chain and drag chain cable
|
|
Germany
|
IGUS
|
1
|
1. Host

(figure 1)
Main materials and parts:Class 00 special high-quality granite platform and three-axis guide rail, precision casting processing aviation aluminum alloy column, United KingdomRENISHAW high-precision grating, reading head length measuring system, SMC precision air filter and automatic detection control device, imported international famous brand DC servo motor, German FESTO air pipe joint, high-quality air bearing, non-linear spring system imported from Germany, German IGUS low friction and noiseless drag chain and high flexible drag chain cable, US Gates (GATES) high-performance timing belt, US imported precision ball bearing, High-grade automotive-grade imported industrial finishes, etc.
1.1 The gantry movable structure and the integral worktable have the characteristics of strong load-bearing capacity, wide workpiece placement space, and convenient loading and unloading. All three-axis guide rails are made of high-quality granite materials, so that the three-axis have the same temperature characteristics, so it has good temperature stability, anti-aging deformation ability, good rigidity, and minimal geometric deformation; processing and inspection of new granite guide rails jointly developed by professional granite manufacturers The technology improves the processing accuracy of granite guide rails to a new level. System equipment, imported internationally renowned brand DC servo motor, German FESTO air pipe joint, high-quality air bearing, non-linear spring system imported from Germany, German IGUS low friction and noiseless drag chain and high flexible drag chain cable, American Gates (GATES) High-performance timing belts, precision ball bearings imported from the United States, high-grade automotive-grade imported industrial finishes, etc.

(figure 2)
1.2 The use of high-precision air bearings and the surrounding bearing layout design (as shown in Figure 1) improves the rigidity and stability of the machine. Even if it works for a long time, it can maintain high accuracy and ensure the excellent dynamic characteristics of the machine.
1.3 The unique Z-axis anti-rotation design is an important part of determining the accuracy of the measuring machine. The reliable anti-rotation structure design can achieve high accuracy even when the probe extension rod is used.
1.4 The application of a unique non-linear spring system (patented technology) (as shown in Figure 2) reduces the influence of the small error of the guide rail on the measurement accuracy, and at the same time ensures that the equipment has a higher environmental temperature adaptability.
(image 3)
1.5 The three-axis adopts high-performance synchronous belt transmission, which can not only obtain high movement speed to improve measurement efficiency, but also minimize the transmission inertia to increase movement acceleration; the vibration isolation design of the transmission system makes it possible to move the machine at high speed Minimize the influence of mechanical vibration on measurement accuracy.
1.6 Imported low-friction and noise-free drag chains reduce the external force interference of various motion axes, and at the same time improve the flexibility and reliability of each motion axis.
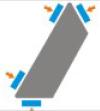
1.7 The beam adopts a unique guide rail structure (as shown in Figure 3). The triangle is the shape with the largest section perimeter in the same area. The triangular guide rail ensures the maximum guide air bearing span under the condition of minimum inertia, which greatly improves the anti-rotation accuracy of the guide rail.
1.8 The length measurement system adopts United KingdomRENISHAW high-precision reflective metal strip grating ruler and reading head, which has extremely high precision and precision stability.
1.9 The SMC high-precision air filter can make the compressed air reach a very high degree of cleanliness to effectively protect the air bearings and guide rails. At the same time, the automatic drainage device makes the operator more worry-free and labor-saving when using it, and avoids equipment damage caused by forgetting to drain. The all-digital gas source detection device strengthens the sensitivity of gas source fluctuation detection and minimizes the influence of gas source on measurement accuracy.
1.10 The complete safety protection device can lock the three-axis in time when some accidents occur, avoiding bigger accidents and protecting the safety of the machine.
1.11 The design of the whole machine conforms to the principle of ergonomics, it is simple and convenient to use, easy to maintain and maintain.
(Figure 4)
2. Control system
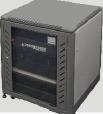
The RENISHAW UCC control system (as shown in Figure 4) is a CNC system specially designed and manufactured for CNC coordinate measuring machines. The control system adopts the principle of separating the control layer and the application layer. It is the height of the coordinate measuring machine (CMM). Precision, accuracy, and high efficiency provide a solid foundation. The control system adopts Ethernet interface and computer communication, no need to expand any computer communication interface, also reduces unnecessary external wiring, and ensures the high reliability of the system.
2.1 The drive system is driven by a DC servo motor, and the three axes can be driven by the motor without gap and vibration according to the speed T curve or S curve.
2.2 According to the 3-axis closed-loop motion configuration, 3 TTL orthogonal pulses can be input, and vector control can be realized.
2.3 The control system is safer and more reliable. It provides multiple control modes. When the shutdown problem occurs, the system can switch to the corresponding mode to stop the machine in the first time. The user does not need to worry about the accident of the speeding car. The function of online fault diagnosis.
2.4 The UCC control system supports a variety of error detection methods, which can easily correct the accuracy of the measuring machine.

(Figure 5 )
2.5 Faster speed, stable motion, and higher efficiency. In the path planning of multi-point continuous motion, you can either follow a straight line or an arc path, which makes the measurement of circular workpieces more convenient.
2.6 The control system is stable and reliable, and maintenance is simple. The separation of the control layer and the application layer makes the system's problem diagnosis and resolution easier and clearer, and the phenomenon that problems on one level spread to another level will no longer exist.
2.7 The humanized design of the control box (as shown in Figure 5). The control box provides users with simpler and more reasonable buttons and joysticks. It not only has traditional speed control, but also provides measurement shortcut keys to make the whole measurement process easier and more convenient.
3. Rational DMIS measurement software
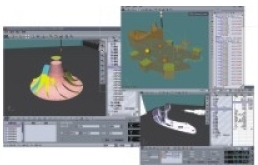
Rational DMIS software is a software certified by the German Institute of Physics and Technology (PTB). It has the ability to express in multiple languages (including Chinese). It is an international measurement software that provides users with advanced technology, complete functions, and stable performance. , Simple and convenient measurement guarantee.
(Figure 6)
3.1 The Rational DMIS software is built on the Windows platform and is very easy to operate.
3.2 Basic measurement functions (Figure 6):
- Measurement and evaluation of geometric elements: points, straight lines, planes, circles, ellipses, cylinders, cones, balls, arcs, keyways, etc. Convenient operation, the operator only needs to perform simple geometric element decomposition of the measured workpiece to distinguish how many geometric elements the measured workpiece consists of, and then the measurement can be completed quickly.
- Construction functions: intersect, divide, project, fit, tangent, parallel, perpendicular, translate, offset, mirror, extract, limit, and rotate.
- Shape error evaluation: straightness, flatness, roundness, cylindricity.
- Position error evaluation: distance, included angle, parallelism, perpendicularity, inclination, concentricity (concentricity), symmetry, position (two-dimensional and three-dimensional), circular runout, full runout.
- Rational DMIS software is convenient and simple to operate, and it perfectly supports drag-and-drop operation, which simplifies the operation process. From measurement, construction, tolerance evaluation to the output of the final report, it can be completed by simply dragging the mouse.
- Measurement and evaluation of curves and curved surfaces. Powerful curve and surface measurement function, which can perform error analysis on curved surfaces and curves through unilateral or bilateral tolerances.
- RENISHAW probe and stylus library. It is convenient to connect, configure, calibrate and use various probes and styluses of RENISHAW.
- Intelligent workpiece alignment. That is, the commonly used 3-2-1 coordinate system establishment method, with graphical prompt operation, simple and convenient operation. It supports the RPS positioning method commonly used in the automotive inspection tool industry, the best fitting method commonly used in surface measurement, and multiple coordinate system establishment methods such as multi-point fitting, three-point offset, and two-point offset.
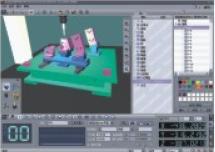
(Picture 7)
9. Multi-coordinate system, multi-probe function conversion is convenient. The software allows multiple coordinate systems to be established in a measurement project, and allows multiple probes to be used. By clicking or dragging with the mouse, the conversion between each coordinate system or each probe can be realized.
3.3 Two-way data transfer function with CAD system (Figure 7):
- Directly receive the mathematical model of IGES, STEP, DXF and other formats transmitted by CAD, and can display the mathematical model graphics transmitted by CAD in solid or wire frame.
- It can realize the layering and coloring of CAD digital model, and can also realize the import of original layering and color separation of CAD digital model, multiple CAD digital model import, CAD digital model mirroring, automatic recognition of theoretical elements of CAD digital model, support points Cloud data processing.
- The theoretical value can be directly read in the CAD model and compared with the measured value.
- It can directly simulate the measurement offline on the CAD digital model and compile the measurement program.
- The measurement results can be output to the CAD system in IGES format.
- It can survey and map the workpiece to be measured, and can also do reverse engineering.
- It can accurately align the CAD digital model of complex workpieces, and rebuild after measurement. And can display the CAD model from multiple views.
3.4 Graphics function
- Three-dimensional solid model display, so that the measured workpiece can be displayed intuitively. The three-dimensional graphics of the measured workpiece and the measured geometric elements can be displayed on the computer screen, and the three-dimensional graphics and size report of the workpiece can be printed out.
- The movement status of the measuring machine can be displayed. With the support of Rational DMIS software, the three-dimensional model of the coordinate measuring machine can be displayed on the computer screen in real time. In the actual measurement process, the actual measurement motion of the probe can be simulated and displayed, that is, the motion posture of the measuring machine and the probe can be simulated in real time. The position of the coordinate measuring machine can be rotated by moving the mouse to adjust the size and proportion of the viewing angle. In addition, the workpiece has a three-dimensional solid model display, which greatly facilitates the operator. When repeating the measurement of the workpiece in the future, the measurement process of the coordinate measuring machine can be understood by observing the screen.
- Graphical display output of measurement results.
- Three-dimensional geometric element icons, rich dynamic toolbars, graphical toolbars and three-dimensional graphics display the measured geometric elements. The operator can operate intuitively and clearly. The measured geometric elements such as faces, cylinders, etc. can be displayed in three-dimensional graphics. Both wired and physical display functions provide a very clear image.
3.5 Two-way transmission of DMIS standard format measurement program, supporting DMIS5.0 standard.
3.6 Self-learning programming function. Convenient self-learning function can automatically compile the entire measurement process into a measurement program. The sequence of measurement is the sequence of program measurement, and the entire program can be edited and offline simulated measurement can be performed.
3.7 Have the ability to work on the Internet.
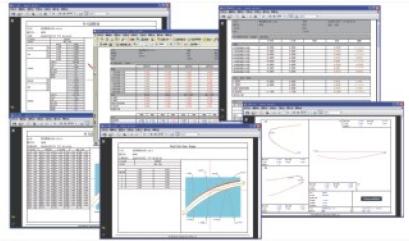
(Picture 8)
3.8 With power-off protection function and self-diagnosis function.
3.9 The online help function is in line with the online help instructions of Windows operating habits. The tree-shaped display and query are simple and convenient, and the operator can easily find the help content needed.
3.10 The measurement results are output (as shown in Figure 8) to report the test results circularly. It is easy to find the help content you need.
- The measurement result report output can be given in the form of pictures and texts, and the result report is intuitive and easy to understand. The measurement results can be output in text format, Excel format, web format, etc. The output in multiple formats enriches the form of the operator's printed measurement report.
- It has the function of designing and printing reports by users. That is, the user can design the icon and factory emblem of the measurement report and insert it into the header of the printed report. The flexible header function makes the output report more user-friendly.
- The output report can display the upper and lower deviation values set by the user, as well as the function of automatically judging whether the measurement result is out of tolerance. Visual DMIS CNC CAD+ software can process the inspection results of any tested workpiece, output user measurement reports, and output the measurement results to IGES and other format files and point cloud formats.
4. Probe system
1 |
RENISHAW MH20i manual double rotating probe
|

|
1
|
|
Technical Parameters:
Index axis A: 0°~90° Step distance: 15°
Indexing axis B: ±180° Step distance: 15°
Spatial measurement orientation: 168 positioning repeatability: 1.5μm
|
|
2
|
RENISHAW Standard Force Measuring Module
|
1
|
|
3
|
RENISHAW 3rd stylus assembly
|
|
3.1
|
Styli A-5000-7804 PS27R (φ2.5×20/14)
|
4
|
|
3.2
|
Styli A-5000-3604 PS1R (φ3.0×10/7.5)
|
1
|
|
3.3
|
Styli A-5000-4161 PS17R (φ4.0×20/20)
|
1
|
|
3.4
|
Stylus extension rod A-5004-7586 (20mm)
|
1
|
|
3.5
|
Stylus extension rod A-5004-7611 (30mm)
|
1
|
|
4
|
Stylus center A-5000-3627 SC2
|
1
|
|
5
|
Stylus tool A-5004-7582
|
1
|
|
6
|
Calibration ball: φ20mm
|
1
|
|
7
|
Universal ball seat
|
1
|
3. Environmental requirements:
- Temperature range: 20±2℃, temperature change: <0.5℃/h <1°C /24h
- Air source pressure: 0.6MPa~0.8MPa,
- Maximum air consumption: 200L/min (0.45MPa)
- Humidity range: 30%-70%
- Power supply: 220V±5 %, 50Hz
- Maximum power: 1 KW
- Ground vibration: vibration frequency ≤10 Hz, amplitude ≤0.5μm
10 Hz<vibration frequency≤30 Hz amplitude ≤1μm
Vibration frequency ≥30 Hz, amplitude ≤3μm



 0086-574-87488065

 Messages


